2 Round label templates are the perfect choice for labeling round containers, bottles, or jars. They are also good for labeling cylindrical items such as pens or pencils. Round labels are available in a variety of sizes and colors.
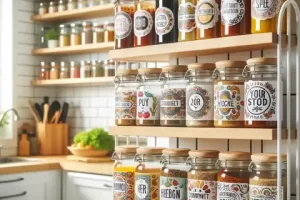
2 round labels are super helpful for lots of reasons. If you have a bunch of jars in your kitchen, these labels can help you remember what’s in each one. Or if you have a lot of pens, you can use these labels to say whose pen is whose.
What are 2 Round Labels?
2 round labels are what they sound like – round labels come in two different sizes. They stick to things and usually have words or pictures on them. You can use them in many places like:
- At Home: Labeling jars in the kitchen or boxes in your playroom.
- In School: Teachers can use them to label supplies or make fun stickers for good work.
- In the Office: They’re for organizing files or marking who owns different office supplies.
All the Different Kinds
One of the best things about 2 round labels is that they come in many sizes and colors. You can pick small, medium, or big labels in colors like red, blue, green, or even sparkly!
Using 2 round labels is a great way to make things look nice and organized. Keep reading to learn all about how to use these labels!
What are the different types of round labels?
There are many different types of round labels.
The following are the most common types:
- Label for alcoholic beverages (beer, wine, spirits)
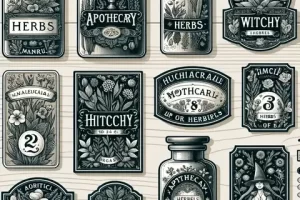
- Label for food products
- Label for health & beauty products
What are the key reasons to use round labels in your business?
Round labels are often used in the business industry because they are more aesthetically pleasing and can be used for various purposes.
- Round labels can be used to differentiate products from one another.
- They are often more aesthetically pleasing than square or rectangular labels.
- Round labels are easier to read, making them ideal for children’s products or people with visual impairments.
- Round labels can create a sense of unity and belonging within your organization or company culture by using the same color scheme on your round label stickers, packaging materials, etc.
- Round stickers are often easier to remove from surfaces than their square counterparts, which is great if you have kids who like to help by wiping the surface down.-Square stickers are often easier to peel off than their circular counterparts.
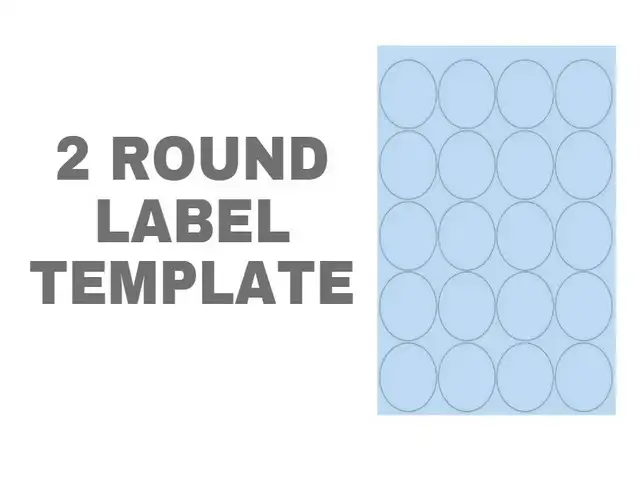
What are the two round label template dimensions?
The 2 round label template dimensions are the label’s outer and inner diameter.
The outer diameter is how big of a circle you want your text to be. This is usually measured in mm or inches. The inner diameter is how big you want your text to be. This can also be measured in mm or inches.


What are the benefits of a 2 round label template?
A 2 round label template is a quick and easy way to create professional and attractive labels.
- The 2 round label template is easy and fast to create labels.
- The 2 round label template is aesthetically pleasing with curved edges, unlike a single line with sharp edges.
- A 2 round label template can be used for many different purposes, such as labeling food containers or creating your business cards!
- A 2 round label template can be created in any size, making it versatile enough for any project you may have in mind!
- The 2 round label template makes your labels look more organized because of its clean lines and lack of clutter on the page!
What are the disadvantages of a 2 round label?
Even though 2 round labels are great, here are some disadvantage
- Not Perfect for All Foods
- Short Shelf Life: Foods like meat and cheese can go bad quickly. A 2 round label might not tell you when to throw them out. It’s like having a clock that doesn’t tell the right time for these foods.
- Needs More Info: These labels are small and round, so they only have a little space. This means they can only give you some of the details about how long to keep the food or how to store it.
- Not Enough Space
- Small Size: You can only fit a few words because the labels are small.
- Hard to Read: The writing can be really small if you try to squeeze in too many words. This makes it hard for some people, like grandparents, to read.
- Not Always the Best Fit
- Shape Matters: Round labels work best on round things. But some products aren’t round, so the label might not stick well or look right.
- Sticking Problems: Sometimes, these labels stick poorly to certain surfaces. It’s like putting a sticker on a wet bottle – it might not stay on.
- Printing Challenges
- Printer Settings: If you want to print your own 2 round labels, you need a printer. Not all printers are good at printing around things.
- Cutting Out: After printing, you must carefully cut the labels. If you don’t cut them right, they might not look nice.
What size rolls can be used with the 2 Round Label printer?
The 2 Round Label printer can print on rolls up to 8 inches in diameter.
Why is it good to use a 2 round label template?
A 2 round label template is a great way to ensure your labels are printed correctly. This is because it has the same format on both sides of the label, and this means that the printer will not have to readjust its settings for printing on the other side of the paper.
How does 2 Round Label differ from other labeling products on the market?
2 Round Label is a revolutionary labeling product that is easy to use and affordable. The company’s mission is to make labels easier for everyone.
It’s also very easy to customize. You can choose from various shapes and colors and upload your logo or design for free. This means you can create perfect labels for your needs, no matter what they are!
2 Round Label has many uses, including labeling food containers, office supplies, and more!
How do you print round labels?
Two Ways to Print Round Labels
Printing round labels can be fun! There are two main ways to do it. Let’s learn about them:
- Printing on Flat Label Sheets
- What It Is: This is like printing on regular paper. But instead, you use special sheets that have round labels on them.
- How to Do It:
- Step 1: Put the label sheet in your printer, just like you would with normal paper.
- Step 2: On your computer, open the design you want to print on the labels.
- Step 3: Click ‘Print’ and watch your printer print your design onto the round labels!
- Cutting Labels from a Roll of Label Stock
- What It Is: Imagine a long roll of stickers. You print on this roll and then cut out the labels.
- How to Do It:
- Step 1: Put the roll into a printer that can handle rolls. Not all printers can do this, so check first!
- Step 2: Print your design onto the roll.
- Step 3: After printing, use scissors or a cutter to cut out each round label carefully.
Is 2 Round Label an environmentally friendly labeling product?
A 2 Round Label is an environmentally friendly labeling product. It is made of paper, which can be recycled. The paper is also printed with biodegradable soy-based inks.
The 2 Round Label is a perfect solution for mess-free labeling because it has a strong adhesive that can stick to any surface. You can use it on glass, metal, and plastic surfaces without worrying about the label peeling off.
Common Mistakes and How to Avoid Them
- Incorrect Size Selection
- Mistake: Choosing a label size that doesn’t fit your item.
- How to Avoid: Measure your item before selecting the label size.
- Not Testing Printer Settings
- Mistake: Printing without checking if your printer can handle round labels.
- How to Avoid: Do a test print with one label to ensure everything looks good.
- Overcrowding the Label with Text
- Mistake: Trying to squeeze too much information onto a small label.
- How to Avoid: Keep your text short and sweet.
- Forgetting About Margins and Alignment
- Mistake: Labels print off-center because of incorrect setup.
- How to Avoid: Use the label template’s guidelines to ensure everything is centered.
- Skipping Proofreading
- Mistake: Having typos or spelling errors on your labels.
- How to Avoid: Always double-check your text before printing.
- Using Low-Quality Graphics
- Mistake: Blurry images or text make the label hard to read.
- How to Avoid: Use high-resolution images and clear, easy-to-read fonts.
- Not Doing a Test Print
- Mistake: Printing a whole batch of labels only to find errors.
- How to Avoid: Always print one label first to check for issues.
- Struggling with Peeling and Sticking
- Mistake: Tearing labels while peeling them off or having them not stick properly.
- How to Avoid: Peel the labels gently and ensure the surface you’re sticking them to is clean and dry.
By avoiding these common mistakes, you can create perfect round labels every time. Remember, making mistakes is part of learning. So, if something goes wrong, try again!
How to Design Your Own 2 Round Labels
Do you want to make your own 2 round labels? Here’s how you can do it:
Step 1: Choose Your Label Type
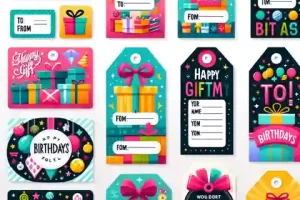
- One-Time Labels: When you want to use a label once, like a label on a gift.
- Reusable Labels: If you want to use your label more than once, like on a container you open and close a lot, pick reusable ones.
Step 2: Pick the Right Size
- Measure First: Before you start, measure where you want to stick your label. This helps you decide how big or small your label should be.
Step 3: Designing Your Label
- Be Creative: Think about what you want on your label. A picture or some words. You can draw something or use a computer to make your design.
- Colors and Fonts: Choose colors and fonts (the style of your words) that you like. You might want simple letters if it’s for something serious, like a jar of jam you made. But for a birthday gift, you can use fun colors and fancy letters!
Step 4: Printing Your Labels
- Print at Home: You can print your labels if you have a printer. Make sure to use label paper that fits your printer.
- Print Shop: If you don’t have a printer, you can take your design to a print shop. They can print it for you.
Step 5: Cutting Out Your Labels
- Use Scissors: After printing, use scissors to cut out your labels. Be careful to cut nicely around the edges.
Step 6: Sticking Your Labels
- Stick Them On: Now, you can label whatever you like! If they’re reusable, you can remove them and stick them again somewhere else.
Tips for a Great Label
- Test First: Print one label first to see if it looks good.
- Ask for Help: If you need more clarification on your design, ask someone for their ideas.
- Have Fun: The best part is being creative and having fun!
Making your own 2 round labels is like being an artist for your stuff. You get to choose everything about your label and make it special. So, go ahead and give it a try!