The 2 X 4 label template word is a popular choice among businesses because it offers more space for labelling, making it easier to read and correcting errors that might have been made on a smaller label template.
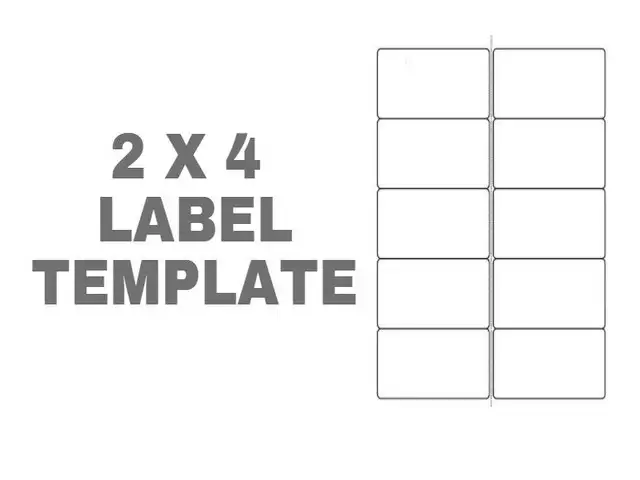
A 2 X 4 label template is a template that has the top row of labels and the bottom row of labels. The labels in the top row are twice as wide as those in the bottom row. These templates are preferred because they offer more space for labelling, and labelling errors can be corrected to make them more accurate.
What are the sizes of 2 x 4 Label Template?
The size of the 2 X 4 label template is 3.5 x 5 inches.
That’s like the size of a big index card. These templates usually have two rows of labels. The top row labels are twice as wide as the ones in the bottom row.

2 x 4 Label Template Word

Creating a 2 x 4 label template in Microsoft Word is like making a map for your labeling adventure. It’s easy and fun! Here’s how you can do it:
Step 1: Open Microsoft Word
- Starting Word: Click on the Word icon on your computer, just like you’re opening your favorite book.
Step 2: Find Label Templates
- Navigating to Labels: Once Word is open, go to the ‘Mailings’ tab at the top, then click on ‘Labels’. It’s like going to the section in a store where they keep all the cool stickers.
Step 3: Choosing the Right Template
- Selecting Template: In the labels window, click on ‘Options’. Then, look for the label brand you’re using (like Avery) and select ‘2 x 4’ as the size. It’s like picking the right size shoe for your feet.
Step 4: Design Your Label
- Getting Creative: Now, you can type in what you want on your label, or even add a picture. It’s your chance to be an artist.
- Making It Look Good: Play with fonts, colors, and sizes to make your label stand out.
Step 5: Preview and Print
- Check Your Work: Click ‘Print Preview’ to see how your labels will look. It’s like peeking into the oven to see if your cookies are done.
- Print It Out: If everything looks good, put your 2 x 4 label sheet in the printer and hit ‘Print’. Watch as your labels come to life!
Step 6: Save Your Template
- Saving for Later: Don’t forget to save your template. That way, you can use it again whenever you need more labels.
Creating 2 x 4 labels in Word is a fantastic way to make sure everything you own is labeled just the way you like it.
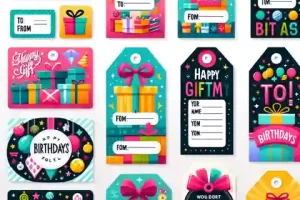
What are the various uses of 2 X 4 labels?

There are many uses of 2 X 4 labels, and they can be used to label storage boxes, toys, books, and clothing.
2 X 4 labels are typically vinyl and have a sticky backing that can be peeled off easily. These labels can be used to identify objects that are stored in large containers or boxes.
2 X 4 labels also come in different colours and sizes, making them easy to use for identifying different types of items.
2 X 4 labels are useful for labelling bookshelves with book titles or organizing clothing in drawers by colour or size.
How many labels come on each sheet?

How many labels are on a sheet? The number of labels that come on each sheet depends on the type of label. In general, the most common type of label is the round sticker. They come in sheets with ten labels per sheet. . How many labels are on a single page? Each page of these stickers has ten stickers per page.
Tips for using 2 X 4 Label
Tips for using 2 x 4 labels are:
- Use the correct size label for the right product.
- Use a permanent marker to write on the label.
- Write legibly and in ink.
- Label all sides of the package.
- Label packages with a date, not just a date and Time.
- Never use stickers or labels that are not designed for food packaging.
The benefits of using it
- It’s an easy way to label your belongings.
- It saves Time when you want to move into a new place.
- The labels are easy to read, and they don’t get lost with the clutter of other items in your home.
- It’s a great way to organize your life.
- It can help you stay organized and be more productive in life.
What are the disadvantages?
Even though 2 x 4 labels are really handy, there are a few things that can be a bit tricky. Let’s talk about these challenges:
- Not Enough Space for Lots of Words
- Problem: Sometimes, you might have a lot to say, but these labels can only fit a few words.
- What You Can Do: Try to use fewer words or make your writing smaller.
- Might Not Stick to All Surfaces
- Problem: These labels have sticky backs, but sometimes they don’t stick well to certain things, like very smooth or wet surfaces.
- What You Can Do: Make sure the place you’re sticking the label is dry and not too smooth. You can also try labels with stronger glue.
- Not Always the Best for Outdoor Use
- Problem: If you use these labels outside, rain or sun can make the ink run or the label fade.
- What You Can Do: If you need a label for outside, look for ones that are waterproof or UV resistant.
- Can Be Hard to Remove
- Problem: Once you stick them, these labels can be hard to take off. They might leave some sticky stuff behind.
- What You Can Do: Be really sure where you want to put your label. If you think you might need to remove it, try a label that’s made to be taken off easily.
- Printer Problems
- Problem: Sometimes, when you print these labels, they might not line up right with your printer.
- What You Can Do: Check your printer settings and do a test print first to make sure everything lines up.
- Not Always Environmentally Friendly
- Problem: Some 2 x 4 labels are made from materials that aren’t good for the environment.
- What You Can Do: Look for labels made from recycled materials or that can be recycled.
2 x 4 labels are great for lots of things, but knowing these little challenges can help you use them even better.
Who are the target users of the 2 X 4 Label?
Who Should Use 2 x 4 Labels?
2 x 4 labels are super helpful for lots of people. Let’s talk about who will love using them the most:
Organizers at Heart
- People Who Love to Be Tidy: If you enjoy having everything in its place, these labels are for you.
- Busy Teachers: Teachers can use them to label classroom supplies or student folders. It makes finding things in a busy classroom a snap.
- Business Owners and Employees: In offices or shops, these labels help keep files and products.
The product is available on Amazon, Walmart, and Target websites.
What is the adhesive on 2 X 4 Labels?
The sticky part on the back of 2 x 4 labels is really important. There are two main types of adhesives used:
Thermoplastic Adhesive
- Like Stretchy Rubber: This kind of glue is stretchy and flexible.
- Sticks Again and Again: You can stick and re-stick these labels a few times.
Thermosetting Adhesive
- Super Strong and Permanent: Once this glue sticks, it stays stuck.
- Doesn’t Melt Easily: This type of adhesive doesn’t get gooey or melt when it gets hot.
Knowing about the different sticky parts on labels helps you choose the right one. Whether you need a label for a short time or something that stays put forever, there’s a 2 x 4 label just right for the job!
Who developed the 2 X 4 Label?
The 2 X 4 Label was developed by the National Bureau of Standards (NBS) in the United States. It is a standard for identifying products and is used to identify sizes, contents, ingredients, etc.
How does It differ from other labelling products on the market?
2 x 4 labels have some cool features that make them stand out from other labels. Let’s find out what makes them special:
- Bigger Size for More Information
- Unique Point: These labels are bigger than many others. It’s like having a larger canvas to paint on. You can fit more words or bigger pictures on them.
- Compared to Others: Smaller labels can be too tiny for lots of details. But on a 2 x 4 label, you can write more and make it easier to read.
- Great for Both Home and Business
- Unique Point: 2 x 4 labels are super versatile. They’re perfect for both home stuff, like labeling jars or boxes, and for business needs.
- Compared to Others: Some labels are really only good for one thing, like just for addresses or just for name tags.
- Strong and Sticky
- Unique Point: These labels stick really well. Once you put them on something, they stay put.
- Compared to Others: Some labels might peel off or fall off after a while, especially if they’re on something that gets moved a lot.
- Variety of Printing Options
- Unique Point: You can print these labels in many different ways, like on a regular printer at home or a fancy one at work.
- Compared to Others: Some labels need special printers or settings, which can be a hassle.
- Eco-Friendly Choices
- Unique Point: There are 2 x 4 labels made with recycled materials or that can be recycled.
- Compared to Others: Not all labels think about the environment, but with 2 x 4 labels, you have greener choices.
- Easy to Write On
- Unique Point: The surface of these labels is easy to write on with pens, markers, or pencils.
- Compared to Others: Some labels have surfaces where ink might smudge or not show up well.
By understanding these unique features, you can see how 2 x 4 labels are different and maybe even better for some things than other types of labels. They’re like a multi-tool – useful in many situations!
How do you print it?
A Simple Guide to Printing 2 x 4 Labels
Printing 2 x 4 labels can be as easy as making a piece of toast! Here’s how you can do it step by step:
- Gather What You Need
- Materials: Make sure you have 2 x 4 label sheets and a printer.
- Create Your Label Design
- Designing: Use a computer program like Microsoft Word or a label-making software to create your label.
- Tips: Make sure your design fits within the 2 x 4 label size. Add words or pictures that you want on your label.
- Setting Up Your Printer
- Printer Settings: Check your printer to make sure it’s ready. Choose the right settings for the label paper size.
- Test Print: Do a test print on regular paper to see if your design looks good.
- Loading the Label Sheets
- Putting in Paper: Carefully place your label sheets in the printer. Make sure they are straight and in the right direction.
- Printing Your Labels
- Start Printing: Click ‘Print’ on your computer and watch your labels come to life!
- Check: Once printed, take a look at your labels to make sure they look just right.
- Letting the Ink Dry
- Drying Time: Give the labels a little time to dry so the ink doesn’t smudge.
- Repeat If Needed
- More Printing: If you need more labels, just put in another sheet and print again. Keep going until you have all the labels you need.
Printing 2 x 4 labels is really not too hard once you get the hang of it. Once you know the steps, you can make as many labels as you want!