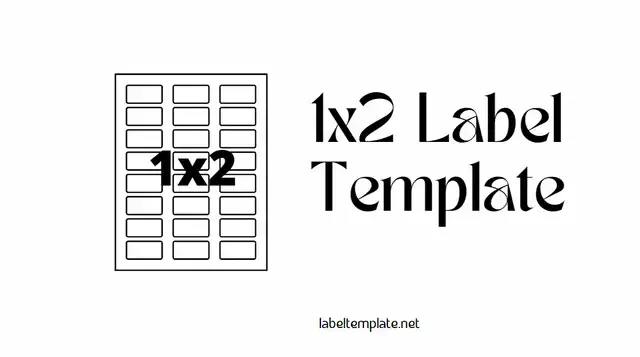
With 1×2 labels, you can quickly and easily customize the look of your labels. This simple tool is perfect for organizing and labeling small items, like screws or bolts. And because it’s easy to use, you’ll find that 1×2 labels are valuable to your toolkit.
What is a 1×2 label?
1×2 label is a quick and easy way to customize your labels. It’s an affordable way to change the look of your labels, and it’s easy to start.
1×2 label prints on Avery 5160 Labels with either offset or digital printing options. They also offer custom labels for just about any need you might have.
1×2 label is perfect for businesses that want to give their products a unique edge without breaking the bank or spending hours on design work. Upload your artwork, choose your printer, and you’re ready!
How to use 1×2 labels?

1×2 labels help you to customize your labels easily. To use them, print out the 1×2 label template, cut it out, and then tape it onto your product. You can also use 1×2 labels as a shopping list or recipe card holder.
1×2 labels are affordable and convenient. They cost less than traditional labeling supplies like pens and post-it notes, and they’re easy to transport since they fit on any letter-size paper. Plus, using 1×2 labels keeps your products organized and accessible from anywhere in your home or office.
Benefits of using 1×2 labels.
1×2 labels are quick and easy to use – snap them onto your product. 1×2 labels are customizable- you can print or personalize them however you want. 1×2 labels provide a unique look for your products that will set them apart from the competition.
1×2 labels also make it easy to track inventory, as each label has its barcode.
Read Also: 4 Per Page Labels: The Best Way to Label Your Files
How to make a 1×2 label with just a ruler and a sheet of paper
Requirements: Ruler or Measuring Tape
Sheet of Paper
Instructions:
- Draw a 1-inch border around the desired area on the sheet of paper.
- Measure the length of the side opposite the border (the long side), and write that number down.
- Double that number and write it down again.
- Cut along the line you drew in Step 2, making sure not to cut through any of the numbers you wrote down in Step 3 or 4
Making a 1×2 label with a ruler and a sheet of paper is easy. First, draw a line with the ruler 1 inch from one corner of the sheet of paper and then draw another 2 inches away from the first line. You can then use the second line as your cutting guide and cut along it.
This simple procedure will get you a perfect 1×2 label every time. These labels are essential for labeling boxes or other containers, so make sure to have some on hand!
Requirements: Ruler or measuring tape
If your ruler is not square, then your 1×2 label will be round.
If your ruler is square, then your 1×2 label will be square.
To make a 1×2 label with just a ruler and a sheet of paper:
1) Draw a perfect circle on the sheet of paper with the ruler.
2) Cut out the circle.
Sheet of paper
With a 1×2 label in hand, it’s time to get creative. Here are some ideas for what you can do with your shiny new label:
- Make a list of the things you need and want to remember
- Create a shopping list or grocery list
- Plan your day or week ahead
- Keep track of important dates or deadlines
- Track progress on projects
Instructions:
- First, measure the width and height of your desired label using a ruler
- Write down the measurements in inches
- Next, fold the sheet of paper in half so that it is twice as wide as your measurement from step 1
- Draw a line down the middle of the folded paper
- On one side of the line you drew, draw a 1-inch border around your desired label size
- On the other side of the line you drew, mark 2-inch squares (the height dimension) for each row on the top and bottom halves of paper
- Cut along both lines with scissors to create rows of squares equal to your measurement from step 2
Draw a 1-inch border around the desired area on the sheet of paper.
If you want to make a 1×2 label, your first step is to draw a 1-inch border around the desired area on the sheet of paper. This border helps keep the sheet of paper in shape and ensures that you have a clean and precise edge when you start printing.
To create this border:
- Use any ruler that has an inscription marking its 1-inch size.
- Find this measurement by dividing the width of your desired label by 2 (e.g., if you want a label that measures 4 inches wide, divide 4 by 2 to get 0.5).
- Make sure that the inscribed line intersects with your chosen border-radius at exactly one point; if it doesn’t, adjust the ruler until it does.
- Continue drawing lines evenly spaced along the circumference of your circle until all sides are covered (see the image below for an example).
Measure the length of the side opposite the border (the long side), and write that number down.
You don’t need a fancy printer, expensive supplies, or any special skills when making labels. All you need is a ruler and some paper.
The number you just wrote down is the width of your label.
The length of the side opposite the border (the long side) is the height of your label.
Double that number and write it down again.
Making 1×2 labels is a quick and easy way to label something. It’s also a great way to take note of important information, like the dimensions of an object or the name of a person. Here’s how you do it:
- Begin by drawing a ruler on your sheet of paper at 1-inch intervals. Ensure that both ends of the ruler are aligned with the edge of your sheet of paper.
- Label one end of the ruler with “A” and label the other end with “B” (see below).
- Double-check that each letter is exactly in line with its corresponding number on the ruler, and then make marks along each side using a pencil or pen (see below).
- Cut out your markings using scissors, careful not to cut into any edges or corners—you should now have two pieces labeled A & B (see image above).
Cut along the line you drew in Step 2, making sure not to cut through any of the numbers you wrote down in Step 3 or 4.
Step 1: Draw a line on the sheet of paper with a ruler
Step 2: Write down the numbers you want to label along the line you drew in Step 1
Step 3: Cut along the line you drew in Step 1, making sure not to cut through any of the numbers you wrote down in Step 2 or 4.
Step 4: Remove the piece of paper with your labeled numbers
Conclusion
Hopefully, this blog post has given you more insight into what 1×2 labels are and how to use them effectively. As I mentioned earlier, these labels are a quick and easy way to customize your labeling needs, and their many benefits make them an essential part of any business. So whether you’re looking for easier product identification or want to add a little extra flair to your packaging, 1×2 labels are the perfect solution.